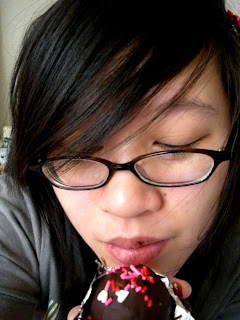
AKA Reese's Cake Balls. :)
Ever since I made "oreo truffles" two Christmases ago, I have toyed with the idea of making cake truffles, an idea brought to me by Bakerella (google it if you wish to know about her blog).
I made these for UTA Vegan Club's Valentine's Day Bake Sale. =) It was our first ever event, and we doubled our expenses in profits! We were afraid we would not do well, since it was snowing and many people did not bother to show up for class (I know I wouldn't have gone if not for the bake sale), but we did quite well. That means that we'll do even better on a regular, non-snow day, in the sunshine!
Above picture courtesy of Georg. ^__^
The procedure for these cake truffles can be divided into four parts: baking the cake, letting the cake cool completely & making the frosting, rolling cake & frosting into balls to freeze, and dipping the frozen cake balls into melted chocolate.
A note I want to make about these cake truffles is that they are extremely decadent and sweet! I'm not sure if it was because I was baking and tasting for 9 hours with the vegan club that day I made these, but I could barely finish the one I was testing. Anyway I feel that using semisweet chocolate for the coating makes the truffles a bit too sweet. I think next time I will either use dark chocolate coating, or omit the sugar from the cake recipe and use the semisweet chocolate coating. The dark chocolate coating looks so beautiful though. I think maybe it was because I was using dark chocolate specifically for coating or something, whereas the semisweet chocolate was just semisweet chocolate chips for baking in general. That's just my guess though.
Part I: Baking the Cake
Basically, I doubled the basic chocolate cupcake recipe from Vegan Cupcakes Take Over the World (
http://www.chow.com/recipes/10794), and baked it in a cake pan. When I make this recipe, I have a few modifications I like to make. It's up to you whether you want to go with the original recipe, or use my modifications, which are as follows:
1. I use chocolate-flavored soymilk where the recipe calls for soymilk. Anna and I find that this gives a more "luscious" chocolatey cake. =)
2. Where the recipe calls for 1/3 a cup of canola oil, I prefer to measure out a scant 1/3 cup (less than 1/3). I find that if I do 1/3 exactly, the results are too oily for my tastes.
3. I also like to use only a scant 1/2 tsp almond extract, or even 1/4 tsp almond extract. The almond flavour overpowered the chocolate (imo) the first time I used this recipe.
Part II: Making Frosting
While the cake is baking, I made Peanut Butter Cream Cheese Frosting. I am sure that PB frosting would work just as well if you don't have Tofutti. I just felt like making PB Cream Cheese Frosting..mm :) I know, I'm a fatty. =P
Peanut Butter Cream Cheese Frosting
4 oz Tofutti cream cheese
1 cup & 3 tablespoons natural creamy peanut butter (Use crunchy if you want your truffles to have a crunch)
2 cups powdered sugar
1 teeny pinch of sea salt
1 tsp vanilla extract
2 tablespoons of soymilk, for starters
1. Using a hand mixer, cream together the Tofutti cream cheese and peanut butter.
2. Mix the powdered sugar in gradually (about 1/4 a cup at a time).
3. Add the sea salt, vanilla, and soymilk and blend until smooth and creamy. Add small amounts of soymilk if you feel your mixture is too dry or crumbly.
4. Put the frosting in the fridge until after the cake has been baked and cooled.
Part III: Constructing the Cake Balls
1. Once the cake is completely cooled, crumble it into the frosting bowl.
2. Thoroughly mix the cake and the frosting together. Use clean fingers! =)
3. Roll the mixture into balls. The average size is about the size of a quarter, or make sure that your ball can fit nicely into a mini cupcake liner. You could make them as small or big as you want, but I like to make mine fit into the mini cupcake liner so that I can put the finished truffles into the liners. It's so cute!
4. Chill the cake balls for several hours. I put mine in a rectangular box in the freezer overnight. To make sure that the cake balls didn't stick to each other, I put a layer of plastic wrap over each layer of them, and topped the plastic wrap with more cake balls. I hope that makes sense.
Part IV: Dipping the Cake Balls
1. Melt your dipping chocolate of choice (I used vegan semisweet chocolate chips by Ghiradelli for half, and dark chocolate for the other half), using a bowl and a microwave, or a double-broiler.
2. Roll a cake ball into the chocolate and set on aluminum foil. I find chopsticks to be very useful for this. If any of the chocolate gets messed up, carefully dab a little on there with your chopstick or spoon.
3. Immediately after setting the cake ball on the aluminum foil, sprinkle some chopped nuts or cute sprinkles on the cake truffle.
4. Repeat steps 2 and 3 until you have finished dipping all of the frozen cake balls.
5. Let the cake truffles sit until the chocolate has hardened. Once the chocolate has fully set, place the truffles into mini cupcake liners. Yay, homemade vegan cake truffles! =)
.JPG)


